- View the Container Registry
- Use images from the Container Registry
- Image naming convention
- Authenticate with the Container Registry
- Build and push images by using Docker commands
- Build and push by using GitLab CI/CD
- Delete images
- Known issues
- Disable the Container Registry for a project
- Change visibility of the Container Registry
- Container Registry visibility permissions
GitLab Container Registry
Searching by image repository name was introduced in GitLab 13.0.
With the Docker Container Registry integrated into GitLab, every GitLab project can have its own space to store its Docker images.
You can read more about Docker Registry at https://docs.docker.com/registry/introduction/.
This document is the user guide. To learn how to enable the Container Registry for your GitLab instance, visit the administrator documentation.
View the Container Registry
You can view the Container Registry for a project or group.
- Go to your project or group.
- Go to Packages and registries > Container Registry.
You can search, sort, filter, and delete containers on this page. You can share a filtered view by copying the URL from your browser.
Only members of the project or group can access a private project’s Container Registry. Images downloaded from a private registry may be available to other users in a shared runner.
If a project is public, so is the Container Registry.
View the tags of a specific image
You can use the Container Registry Tag Details page to view a list of tags associated with a given container image:
- Go to your project or group.
- Go to Packages and registries > Container Registry.
- Select the container image you are interested in.
You can view details about each tag, such as when it was published, how much storage it consumes, and the manifest and configuration digests.
You can search, sort (by tag name), filter, and delete tags on this page. You can share a filtered view by copying the URL from your browser.
Use images from the Container Registry
To download and run a container image hosted in the GitLab Container Registry:
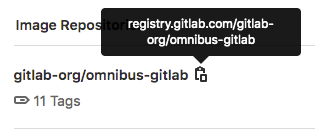
- Copy the link to your container image:
- Go to your project or group’s Packages and registries > Container Registry and find the image you want.
- Next to the image name, select Copy.
-
Use
docker runwith the image link:docker run [options] registry.example.com/group/project/image [arguments]
Authentication is needed to download images from a private repository.
For more information on running Docker containers, visit the Docker documentation.
Image naming convention
Images follow this naming convention:
<registry URL>/<namespace>/<project>/<image>
If your project is gitlab.example.com/mynamespace/myproject, for example,
then your image must be named gitlab.example.com/mynamespace/myproject at a minimum.
You can append additional names to the end of an image name, up to two levels deep.
For example, these are all valid image names for images in the project named myproject:
registry.example.com/mynamespace/myproject:some-tag
registry.example.com/mynamespace/myproject/image:latest
registry.example.com/mynamespace/myproject/my/image:rc1
Authenticate with the Container Registry
To authenticate with the Container Registry, you can use a:
All of these require the minimum scope to be:
- For read (pull) access,
read_registry. - For write (push) access,
write_registry&read_registry.
To authenticate, run the docker command. For example:
docker login registry.example.com -u <username> -p <token>
Build and push images by using Docker commands
Before you can build and push images, you must authenticate with the Container Registry.
To build and push to the Container Registry:
-
Authenticate with the Container Registry.
-
Run the command to build or push. For example, to build:
docker build -t registry.example.com/group/project/image .Or to push:
docker push registry.example.com/group/project/image
To view these commands, go to your project’s Packages and registries > Container Registry.
Build and push by using GitLab CI/CD
Use GitLab CI/CD to build and push images to the Container Registry. Use it to test, build, and deploy your project from the Docker image you created.
Authenticate by using GitLab CI/CD
Before you can build and push images by using GitLab CI/CD, you must authenticate with the Container Registry.
To use CI/CD to authenticate, you can use:
-
The
CI_REGISTRY_USERCI/CD variable.This variable has read-write access to the Container Registry and is valid for one job only. Its password is also automatically created and assigned to
CI_REGISTRY_PASSWORD.docker login -u $CI_REGISTRY_USER -p $CI_REGISTRY_PASSWORD $CI_REGISTRY -
A CI job token.
docker login -u $CI_REGISTRY_USER -p $CI_JOB_TOKEN $CI_REGISTRY - A deploy token with the minimum scope of:
- For read (pull) access,
read_registry. - For write (push) access,
write_registry.
docker login -u $CI_DEPLOY_USER -p $CI_DEPLOY_PASSWORD $CI_REGISTRY - For read (pull) access,
- A personal access token with the minimum scope of:
- For read (pull) access,
read_registry. - For write (push) access,
write_registry.
docker login -u <username> -p <access_token> $CI_REGISTRY - For read (pull) access,
Configure your .gitlab-ci.yml file
You can configure your .gitlab-ci.yml file to build and push images to the Container Registry.
- If multiple jobs require authentication, put the authentication command in the
before_script. - Before building, use
docker build --pullto fetch changes to base images. It takes slightly longer, but it ensures your image is up-to-date. -
Before each
docker run, do an explicitdocker pullto fetch the image that was just built. This step is especially important if you are using multiple runners that cache images locally.If you use the Git SHA in your image tag, each job is unique and you should never have a stale image. However, it’s still possible to have a stale image if you rebuild a given commit after a dependency has changed.
- Don’t build directly to the
latesttag because multiple jobs may be happening simultaneously.
Container Registry examples with GitLab CI/CD
If you’re using Docker-in-Docker on your runners, this is how your .gitlab-ci.yml
should look:
build:
  image: docker:20.10.16
  stage: build
  services:
    - docker:20.10.16-dind
  script:
    - docker login -u $CI_REGISTRY_USER -p $CI_REGISTRY_PASSWORD $CI_REGISTRY
    - docker build -t $CI_REGISTRY/group/project/image:latest .
    - docker push $CI_REGISTRY/group/project/image:latest
You can also make use of other CI/CD variables to avoid hard-coding:
build:
  image: docker:20.10.16
  stage: build
  services:
    - docker:20.10.16-dind
  variables:
    IMAGE_TAG: $CI_REGISTRY_IMAGE:$CI_COMMIT_REF_SLUG
  script:
    - docker login -u $CI_REGISTRY_USER -p $CI_REGISTRY_PASSWORD $CI_REGISTRY
    - docker build -t $IMAGE_TAG .
    - docker push $IMAGE_TAG
In this example, $CI_REGISTRY_IMAGE resolves to the address of the registry tied
to this project. $CI_COMMIT_REF_NAME resolves to the branch or tag name, which
can contain forward slashes. Image tags can’t contain forward slashes. Use
$CI_COMMIT_REF_SLUG as the image tag. You can declare the variable, $IMAGE_TAG,
combining $CI_REGISTRY_IMAGE and $CI_REGISTRY_IMAGE to save some typing in the
script section.
Here’s a more elaborate example that splits up the tasks into 4 pipeline stages,
including two tests that run in parallel. The build is stored in the container
registry and used by subsequent stages, downloading the image
when needed. Changes to main also get tagged as latest and deployed using
an application-specific deploy script:
image: docker:20.10.16
services:
  - docker:20.10.16-dind

stages:
  - build
  - test
  - release
  - deploy

variables:
  # Use TLS https://docs.gitlab.com/ee/ci/docker/using_docker_build.html#tls-enabled
  DOCKER_HOST: tcp://docker:2376
  DOCKER_TLS_CERTDIR: "/certs"
  CONTAINER_TEST_IMAGE: $CI_REGISTRY_IMAGE:$CI_COMMIT_REF_SLUG
  CONTAINER_RELEASE_IMAGE: $CI_REGISTRY_IMAGE:latest

before_script:
  - docker login -u $CI_REGISTRY_USER -p $CI_REGISTRY_PASSWORD $CI_REGISTRY

build:
  stage: build
  script:
    - docker build --pull -t $CONTAINER_TEST_IMAGE .
    - docker push $CONTAINER_TEST_IMAGE

test1:
  stage: test
  script:
    - docker pull $CONTAINER_TEST_IMAGE
    - docker run $CONTAINER_TEST_IMAGE /script/to/run/tests

test2:
  stage: test
  script:
    - docker pull $CONTAINER_TEST_IMAGE
    - docker run $CONTAINER_TEST_IMAGE /script/to/run/another/test

release-image:
  stage: release
  script:
    - docker pull $CONTAINER_TEST_IMAGE
    - docker tag $CONTAINER_TEST_IMAGE $CONTAINER_RELEASE_IMAGE
    - docker push $CONTAINER_RELEASE_IMAGE
  only:
    - main

deploy:
  stage: deploy
  script:
    - ./deploy.sh
  only:
    - main
  environment: production
docker pull. If you prefer to implicitly pull the
built image using image:, and use either the Docker
or Kubernetes executor,
make sure that pull_policy
is set to always.Using a Docker-in-Docker image from your Container Registry
To use your own Docker images for Docker-in-Docker, follow these steps in addition to the steps in the Docker-in-Docker section:
- Update the
imageandserviceto point to your registry. - Add a service alias.
Below is an example of what your .gitlab-ci.yml should look like:
build:
  image: $CI_REGISTRY/group/project/docker:20.10.16
  services:
    - name: $CI_REGISTRY/group/project/docker:20.10.16-dind
      alias: docker
  stage: build
  script:
    - docker build -t my-docker-image .
    - docker run my-docker-image /script/to/run/tests
If you forget to set the service alias, the docker:20.10.16 image is unable to find the
dind service, and an error like the following is thrown:
error during connect: Get http://docker:2376/v1.39/info: dial tcp: lookup docker on 192.168.0.1:53: no such host
Using a Docker-in-Docker image with Dependency Proxy
To use your own Docker images with Dependency Proxy, follow these steps in addition to the steps in the Docker-in-Docker section:
- Update the
imageandserviceto point to your registry. - Add a service alias.
Below is an example of what your .gitlab-ci.yml should look like:
build:
  image: ${CI_DEPENDENCY_PROXY_GROUP_IMAGE_PREFIX}/docker:20.10.16
  services:
    - name: ${CI_DEPENDENCY_PROXY_GROUP_IMAGE_PREFIX}/docker:18.09.7-dind
      alias: docker
  stage: build
  script:
    - docker build -t my-docker-image .
    - docker run my-docker-image /script/to/run/tests
If you forget to set the service alias, the docker:20.10.16 image is unable to find the
dind service, and an error like the following is thrown:
error during connect: Get http://docker:2376/v1.39/info: dial tcp: lookup docker on 192.168.0.1:53: no such host
Delete images
You can delete images from your Container Registry in multiple ways.
On self-managed instances, deleting an image doesn’t free up storage space - it only marks the image as eligible for deletion. To actually delete images and recover storage space, in case they’re unreferenced, administrators must run garbage collection.
On GitLab.com, the latest version of the Container Registry includes an automatic online garbage collector. For more information, see this blog post. The automatic online garbage collector is an instance-wide feature, rolling out gradually to a subset of the user base. Some new image repositories created from GitLab 14.5 onward are served by this new version of the Container Registry. In this new version of the Container Registry, layers that aren’t referenced by any image manifest, and image manifests that have no tags and aren’t referenced by another manifest (such as multi-architecture images), are automatically scheduled for deletion after 24 hours if left unreferenced.
Delete images using the GitLab UI
To delete images using the GitLab UI:
- Go to your project’s or group’s Packages and registries > Container Registry.
-
From the Container Registry page, you can select what you want to delete, by either:
- Deleting the entire repository, and all the tags it contains, by selecting the red Trash icon.
- Navigating to the repository, and deleting tags individually or in bulk by selecting the red Trash icon next to the tag you want to delete.
- In the dialog box, select Remove tag.
Delete images using the API
If you want to automate the process of deleting images, GitLab provides an API. For more information, see the following endpoints:
- Delete a Registry repository
- Delete an individual Registry repository tag
- Delete Registry repository tags in bulk
Delete images using GitLab CI/CD
The following example defines two stages: build, and clean. The
build_image job builds the Docker image for the branch, and the
delete_image job deletes it. The reg executable is downloaded and used to
remove the image matching the $CI_PROJECT_PATH:$CI_COMMIT_REF_SLUG
predefined CI/CD variable.
To use this example, change the IMAGE_TAG variable to match your needs:
stages:
  - build
  - clean

build_image:
  image: docker:20.10.16
  stage: build
  services:
    - docker:20.10.16-dind
  variables:
    IMAGE_TAG: $CI_REGISTRY_IMAGE:$CI_COMMIT_REF_SLUG
  script:
    - docker login -u $CI_REGISTRY_USER -p $CI_REGISTRY_PASSWORD $CI_REGISTRY
    - docker build -t $IMAGE_TAG .
    - docker push $IMAGE_TAG
  only:
    - branches
  except:
    - main

delete_image:
  before_script:
    - curl --fail --show-error --location "https://github.com/genuinetools/reg/releases/download/v$REG_VERSION/reg-linux-amd64" --output ./reg
    - echo "$REG_SHA256  ./reg" | sha256sum -c -
    - chmod a+x ./reg
  image: curlimages/curl:7.86.0
  script:
    - ./reg rm -d --auth-url $CI_REGISTRY -u $CI_REGISTRY_USER -p $CI_REGISTRY_PASSWORD $IMAGE_TAG
  stage: clean
  variables:
    IMAGE_TAG: $CI_PROJECT_PATH:$CI_COMMIT_REF_SLUG
    REG_SHA256: ade837fc5224acd8c34732bf54a94f579b47851cc6a7fd5899a98386b782e228
    REG_VERSION: 0.16.1
  only:
    - branches
  except:
    - main
reg release from
the releases page, then update
the code example by changing the REG_SHA256 and REG_VERSION variables
defined in the delete_image job.Delete images by using a cleanup policy
You can create a per-project cleanup policy to ensure older tags and images are regularly removed from the Container Registry.
Known issues
Moving or renaming existing Container Registry repositories is not supported after you have pushed images. The images are stored in a path that matches the repository path. To move or rename a repository with a Container Registry, you must delete all existing images. Community suggestions to work around this known issue have been shared in issue 18383.
Disable the Container Registry for a project
The Container Registry is enabled by default.
You can, however, remove the Container Registry for a project:
- Go to your project’s Settings > General page.
- Expand the Visibility, project features, permissions section and disable Container Registry.
- Select Save changes.
The Packages and registries > Container Registry entry is removed from the project’s sidebar.
Change visibility of the Container Registry
Introduced in GitLab 14.2.
By default, the Container Registry is visible to everyone with access to the project. You can, however, change the visibility of the Container Registry for a project.
See the Container Registry visibility permissions for more details about the permissions that this setting grants to users.
- Go to your project’s Settings > General page.
- Expand the section Visibility, project features, permissions.
-
Under Container Registry, select an option from the dropdown list:
-
Everyone With Access (Default): The Container Registry is visible to everyone with access to the project. If the project is public, the Container Registry is also public. If the project is internal or private, the Container Registry is also internal or private.
-
Only Project Members: The Container Registry is visible only to project members with Reporter role or higher. This visibility is similar to the behavior of a private project with Container Registry visibility set to Everyone With Access.
-
- Select Save changes.
Container Registry visibility permissions
The ability to view the Container Registry and pull images is controlled by the Container Registry’s visibility permissions. You can change this through the visibility setting on the UI or the API. Other permissions such as updating the Container Registry and pushing or deleting images are not affected by this setting. However, disabling the Container Registry disables all Container Registry operations.
| Anonymous (Everyone on internet) | Guest | Reporter, Developer, Maintainer, Owner | ||
|---|---|---|---|---|
| Public project with Container Registry visibility set to Everyone With Access (UI) or enabled (API)
| View Container Registry and pull images | Yes | Yes | Yes |
| Public project with Container Registry visibility set to Only Project Members (UI) or private (API)
| View Container Registry and pull images | No | No | Yes |
| Internal project with Container Registry visibility set to Everyone With Access (UI) or enabled (API)
| View Container Registry and pull images | No | Yes | Yes |
| Internal project with Container Registry visibility set to Only Project Members (UI) or private (API)
| View Container Registry and pull images | No | No | Yes |
| Private project with Container Registry visibility set to Everyone With Access (UI) or enabled (API)
| View Container Registry and pull images | No | No | Yes |
| Private project with Container Registry visibility set to Only Project Members (UI) or private (API)
| View Container Registry and pull images | No | No | Yes |
Any project with Container Registry disabled
| All operations on Container Registry | No | No | No |