Enterprise users
Enterprise users have user accounts that are administered by an organization that has purchased a GitLab subscription.
Enterprise users are identified by the Enterprise badge next to their names on the Members list.
Provision an enterprise user
A user account is considered an enterprise account when:
- A user without an existing GitLab user account uses the group’s SAML SSO to sign in for the first time.
- SCIM creates the user account on behalf of the group.
A user can also manually connect an identity provider (IdP) to a GitLab account whose email address matches the subscribing organization’s domain. By selecting Authorize when connecting these two accounts, the user account with the matching email address is classified as an enterprise user. However, this user account does not have an Enterprise badge in GitLab.
Although a user can be a member of more than one group, each user account can be provisioned by only one group. As a result, a user is considered an enterprise user under one top-level group only.
Verified domains for groups
The following automated processes use verified domains to run:
Set up a verified domain
Prerequisites:
- A custom domain name
example.comor subdomainsubdomain.example.com. - Access to your domain’s server control panel to set up a DNS
TXTrecord to verify your domain’s ownership.
Setting up a verified domain is similar to setting up a custom domain on GitLab Pages. However, you must:
- Link the domain to a project. For more information on group-level domain verification, see issue 5299.
- Configure the DNS
TXTrecord to verify the domain’s ownership.
Steps:
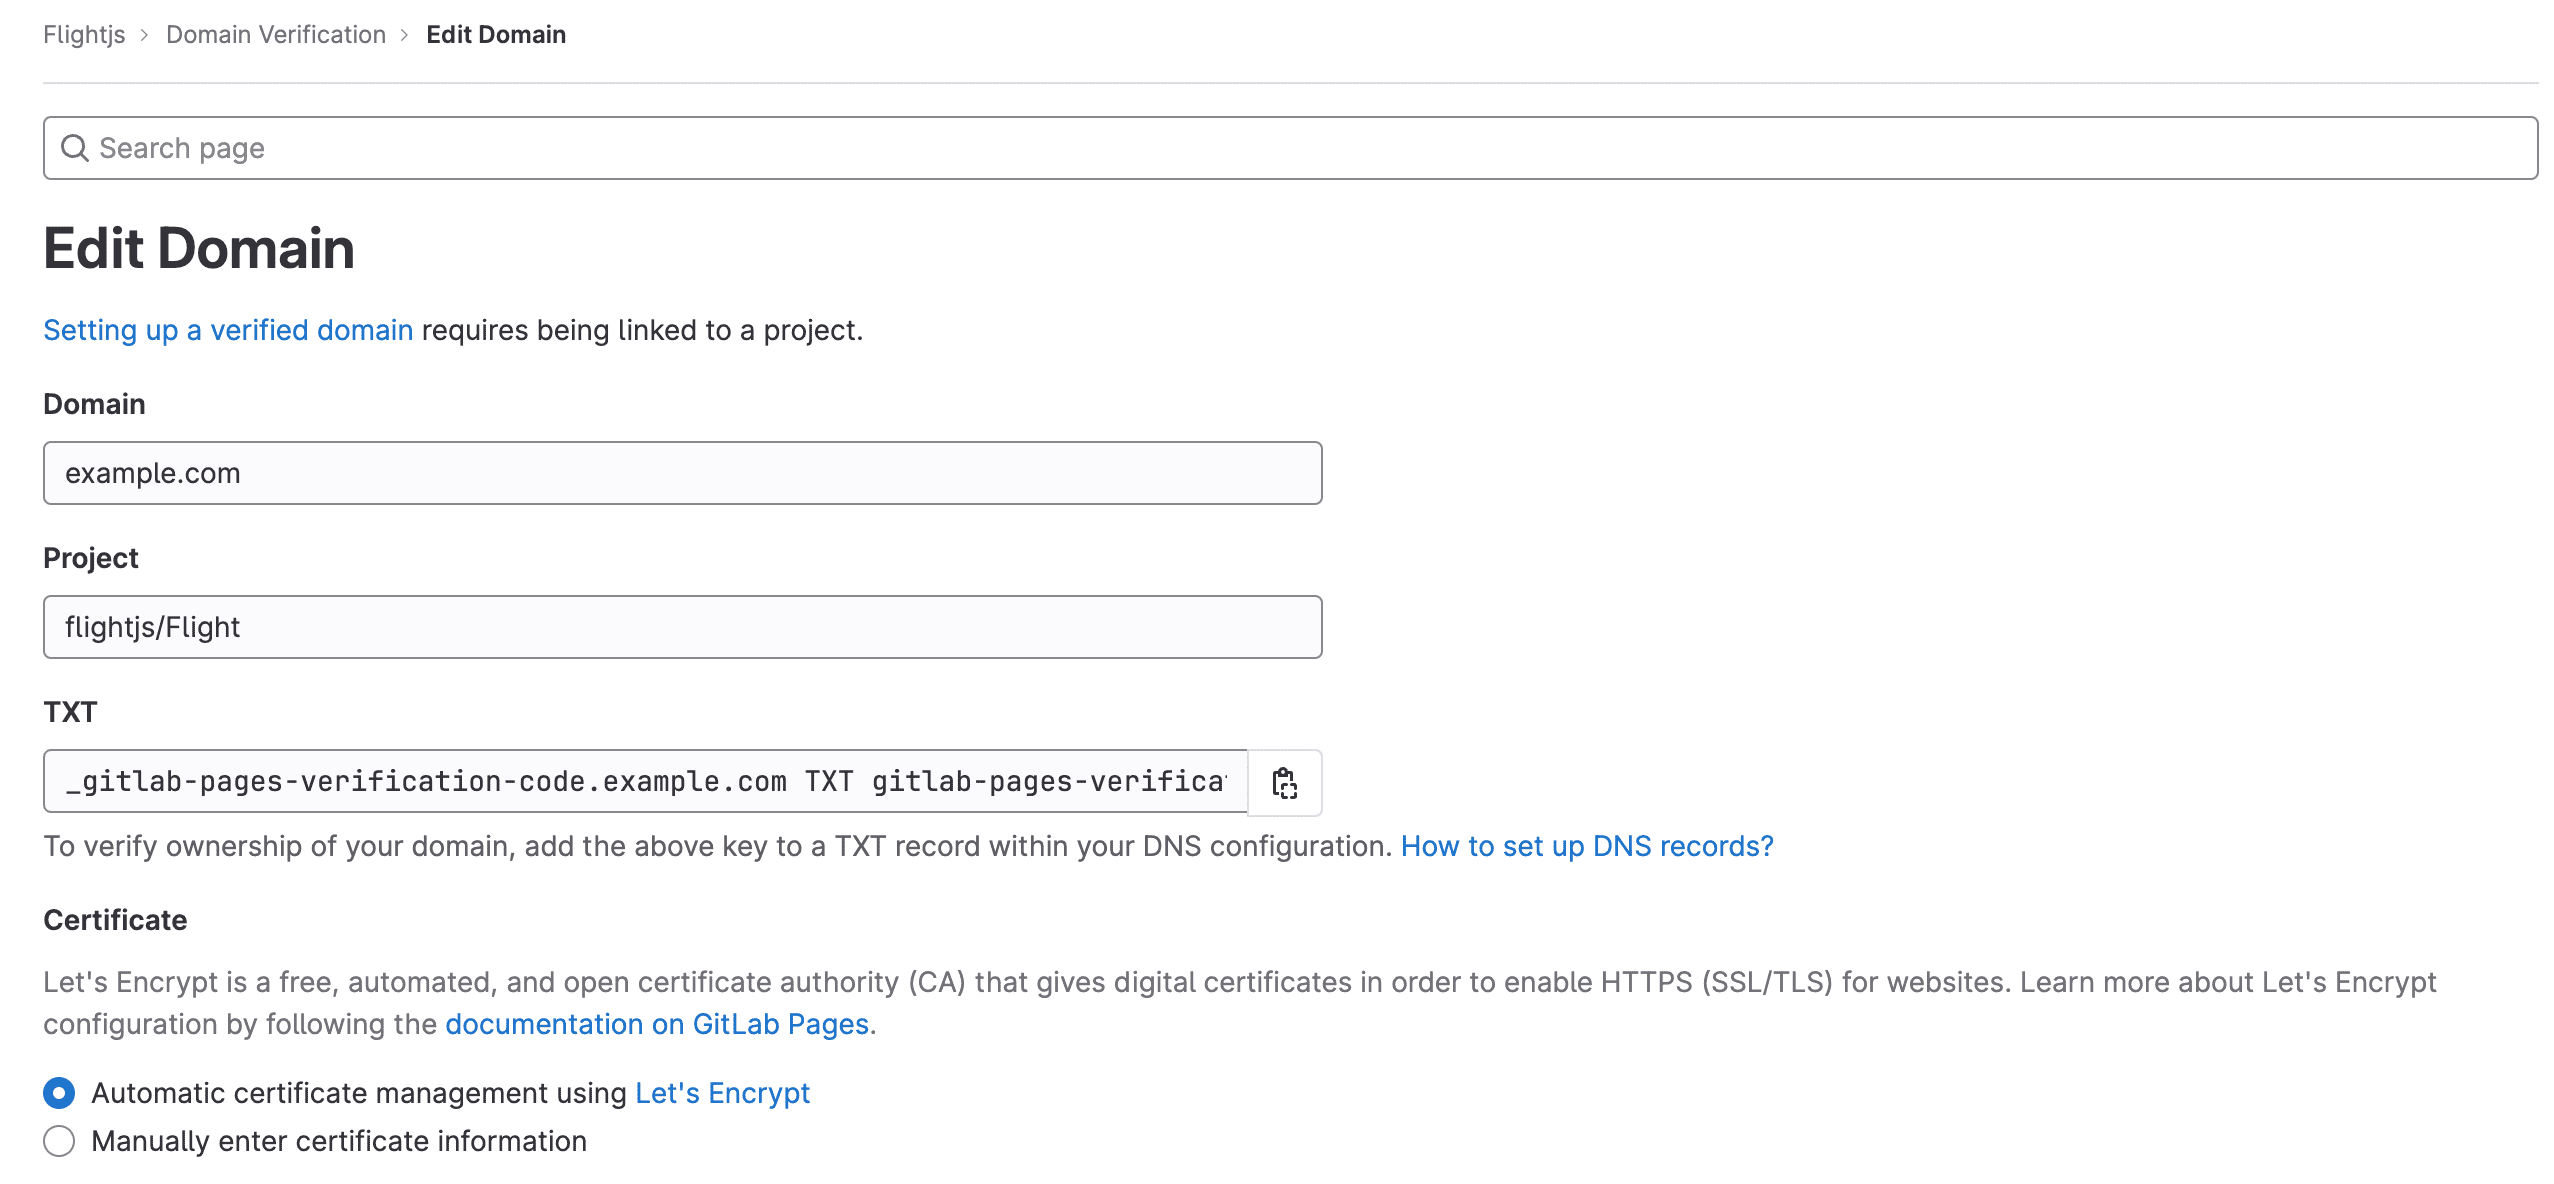
1. Add a custom domain for the matching email domain
The custom domain must match the email domain exactly. For example, if your email is username@example.com, verify the example.com domain.
- On the top bar, select Main menu > Groups and find your top group.
- On the left sidebar, select Settings > Domain Verification.
- In the upper-right corner, select Add Domain.
- In Domain, enter the domain name.
- In Project, link to a project.
- Optional. In Certificate, switch the Manually enter certificate information toggle to add an SSL/TLS certificate. You can also add the certificate and key later.
- Select Add Domain.
2. Get a verification code
After you create a new domain, the verification code prompts you. Copy the values from GitLab
and paste them in your domain’s control panel as a TXT record.
3. Verify the domain’s ownership
After you have added all the DNS records:
- On the top bar, select Main menu > Groups and find your group.
- On the left sidebar, select Settings > Domain Verification.
- On the domain table row, Select Retry verification ().
Notes:
- Domain verification is required for GitLab.com users; for GitLab self-managed instances, your GitLab administrator has the option to disabled custom domain verification.
- DNS propagation may take some time (up to 24 hours), although it’s usually a matter of minutes to complete. Until it does, verification fails, and attempts to visit your domain result in a 404.
- Once your domain has been verified, leave the verification record in place. Your domain is periodically reverified, and may be disabled if the record is removed.
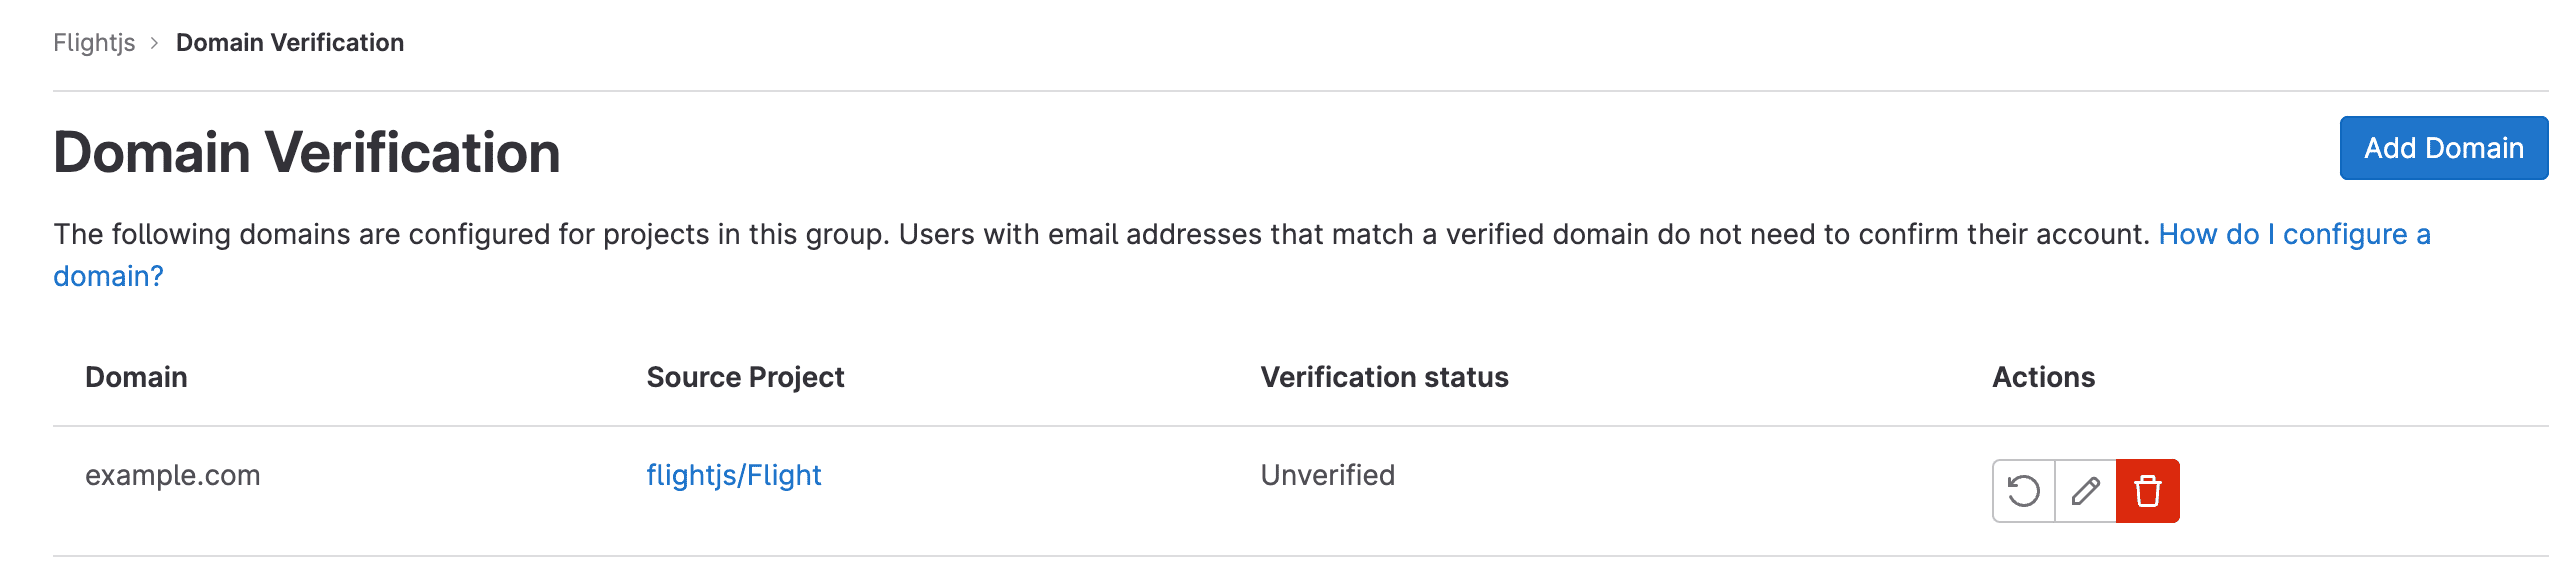
View domains in group
To view all configured domains in your group:
- On the top bar, select Main menu > Groups and find your top-level group.
- On the left sidebar, select Settings > Domain Verification.
You then see:
- A list of added domains.
- The domains’ status of Verified or Unverified.
- The project where the domain has been configured.
Manage enterprise users in a namespace
A top-level Owner of a namespace on a paid plan can retrieve information about and manage enterprise user accounts in that namespace.
These enterprise user-specific actions are in addition to the standard group member permissions.
Disable two-factor authentication
Introduced in GitLab 15.8.
Top-level group Owners can disable two-factor authentication (2FA) for enterprise users.
To disable 2FA:
- On the top bar, select Main menu > Groups and find your group.
- On the left sidebar, select Group information > Members.
- Find a user with the Enterprise and 2FA badges.
- Select More actions () and select Disable two-factor authentication.
Prevent users from creating groups and projects outside the corporate group
A SAML identity administrator can configure the SAML response to set:
- Whether users can create groups.
- The maximum number of personal projects users can create.
For more information, see the supported user attributes for SAML responses.
Bypass email confirmation for provisioned users
A top-level group Owner can set up verified domains to bypass confirmation emails.
Get users’ email addresses through the API
A top-level group Owner can use the group and project members API to access users’ information, including email addresses.