GitLab.com for Jira Cloud app all tiers
You can integrate GitLab and Jira Cloud using the GitLab.com for Jira Cloud app in the Atlassian Marketplace.
Only Jira users with administrator access can install or configure the GitLab.com for Jira Cloud app.
Install the GitLab.com for Jira Cloud app all tierssaas
If you use GitLab.com and Jira Cloud, you can install the GitLab.com for Jira Cloud app. If you do not use both of these environments, use the Jira DVCS Connector or install GitLab.com for Jira Cloud app for self-managed instances. We recommend the GitLab.com for Jira Cloud app, because data is synchronized in real time. The DVCS connector updates data only once per hour.
To configure the GitLab.com for Jira Cloud app, you must have at least the Maintainer role in the GitLab.com namespace.
This integration method supports Smart Commits.
For a walkthrough of the integration with GitLab.com for Jira Cloud app, watch Configure GitLab.com Jira Could Integration using Marketplace App on YouTube.
To install the GitLab.com for Jira Cloud app:
- In Jira, go to Jira Settings > Apps > Find new apps, then search for GitLab.
-
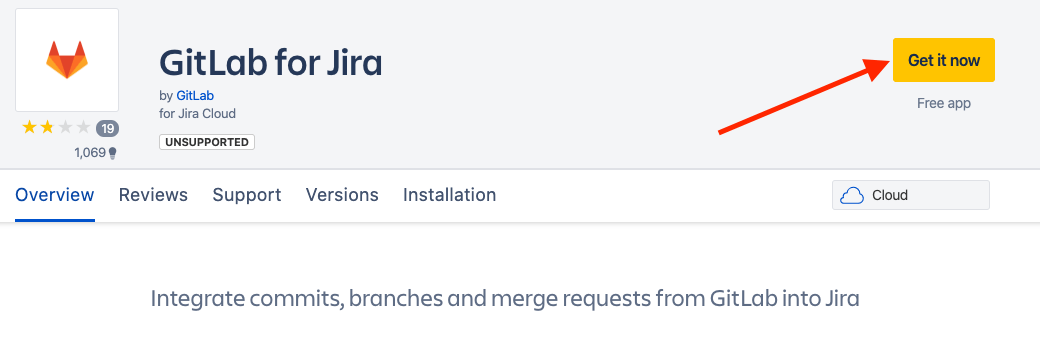
Select GitLab.com for Jira Cloud, then select Get it now, or go to the App in the marketplace directly.
-
After installing, to go to the configurations page, select Get started. This page is always available under Jira Settings > Apps > Manage apps.

-
To add namespaces, ensure you’re signed in to GitLab.com as a user with at least the Maintainer role.
-
To open the list of available namespaces, select Add namespace.
- Identify the namespace you want to link, and select Link.
- You must have at least the Maintainer role for the namespace.
- Only Jira site administrators can add or remove namespaces for an installation.

After a namespace is added:
- All future commits, branches, and merge requests of all projects under that namespace are synced to Jira.
- From GitLab 13.8, past merge request data is synced to Jira.
Support for syncing past branch and commit data is tracked in this issue.
Update the GitLab.com for Jira Cloud app
Most updates to the app are fully automated and don’t require any user interaction. See the Atlassian Marketplace documentation for details.
If the app requires additional permissions, the update must first be manually approved in Jira.
Connect the GitLab.com for Jira Cloud app for self-managed instances all tiersself-managed
Introduced in GitLab 15.7.
Prerequisites:
- GitLab.com must serve as a proxy for the instance.
- The instance must be publicly available.
- The instance must be on version 15.7 or later.
You can link self-managed instances after installing the GitLab.com for Jira Cloud app from the marketplace. Jira apps can only link to one URL per marketplace listing. The official listing links to GitLab.com.
It’s not possible to create branches from Jira for self-managed instances.
Set up your instance
To set up your self-managed instance for the GitLab.com for Jira Cloud app in GitLab 15.7 or later:
- On the top bar, select Main menu > Admin.
- On the left sidebar, select Applications (
/admin/applications). - Select New application.
- In Redirect URI, enter
https://gitlab.com/-/jira_connect/oauth_callbacks. - Ensure the Trusted and Confidential checkboxes are cleared.
- In Scopes, select the api checkbox only.
- Select Save application.
- Copy the Application ID value.
- On the left sidebar, select Settings > General (
/admin/application_settings/general). - Expand the GitLab for Jira App section.
- Paste the Application ID value into Jira Connect Application ID.
- In Jira Connect Proxy URL, enter
https://gitlab.com. - Select Save changes.
Link your instance
To link your self-managed instance to the GitLab.com for Jira Cloud app:
- Install the GitLab.com for Jira Cloud app.
- Select GitLab (self-managed).
- Enter your GitLab instance URL.
- Select Save.
Install the GitLab.com for Jira Cloud app for self-managed instances all tiersself-managed
If your GitLab instance is self-managed, you must follow some extra steps to install the GitLab.com for Jira Cloud app, and your GitLab instance must be accessible by Jira.
Each Jira Cloud application must be installed from a single location. Jira fetches a manifest file from the location you provide. The manifest file describes the application to the system. To support self-managed GitLab instances with Jira Cloud, you can either:
Install the application manually
You can configure your Atlassian Cloud instance to allow you to install applications from outside the Marketplace, which allows you to install the application:
- Sign in to your Jira instance as an administrator.
- Place your Jira instance into development mode.
- Sign in to your GitLab application as a user with administrator access.
- Install the GitLab application from your Jira instance, as
described in the Atlassian developer guides:
-
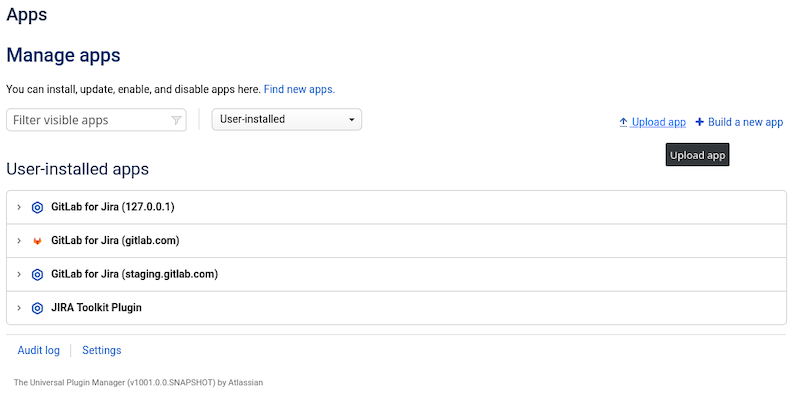
In your Jira instance, go to Apps > Manage Apps and select Upload app:
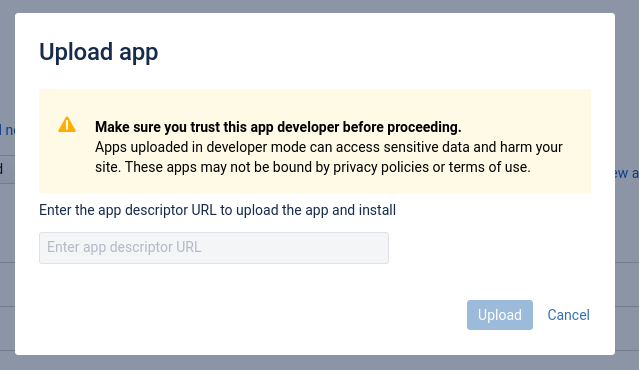
- For App descriptor URL, provide the full URL to your manifest file, based
on your instance configuration. By default, your manifest file is located at
/-/jira_connect/app_descriptor.json. For example, if your GitLab self-managed instance domain isapp.pet-store.cloud, your manifest file is located athttps://app.pet-store.cloud/-/jira_connect/app_descriptor.json. - Select Upload. Jira fetches the content of your
app_descriptorfile and installs it. -
If the upload is successful, Jira displays a modal panel: Installed and ready to go! To configure the integration, select Get started.
-
- Disable development mode on your Jira instance.
The GitLab.com for Jira Cloud app now displays under Manage apps. You can also select Get started to open the configuration page rendered from your GitLab instance.
Create a Marketplace listing
If you prefer to not use development mode on your Jira instance, you can create your own Marketplace listing for your instance. This enables your application to be installed from the Atlassian Marketplace.
For full instructions, review the Atlassian guide to creating a marketplace listing. To create a Marketplace listing:
- Register as a Marketplace vendor.
- List your application using the application descriptor URL.
- Your manifest file is located at:
https://your.domain/your-path/-/jira_connect/app_descriptor.json - We recommend you list your application as
private, because public applications can be viewed and installed by any user.
- Your manifest file is located at:
- Generate test license tokens for your application.
Troubleshooting
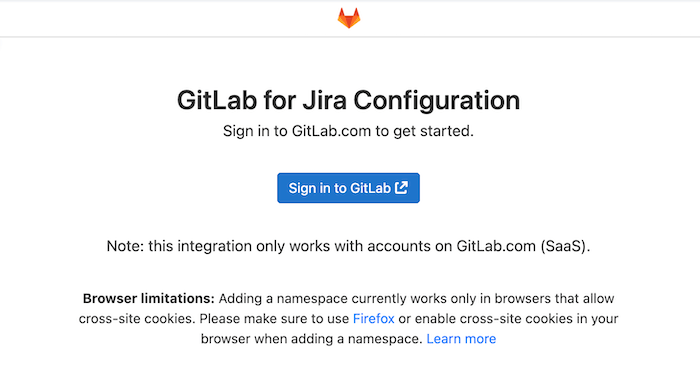
Browser displays a sign-in message when already signed in
You might get the following message prompting you to sign in to GitLab.com when you’re already signed in:
You need to sign in or sign up before continuing.
The GitLab.com for Jira Cloud app uses an iframe to add namespaces on the settings page. Some browsers block cross-site cookies, which can lead to this issue.
To resolve this issue, use either Firefox or Chrome or enable cross-site cookies in your browser.
Manual installation fails
You might get an error if you have installed the GitLab.com for Jira Cloud app from the official marketplace listing and replaced it with manual installation. To resolve this issue, disable the Jira Connect Proxy URL setting.
-
In GitLab 15.7:
- Open a Rails console.
- Execute
ApplicationSetting.current_without_cache.update(jira_connect_proxy_url: nil).
-
In GitLab 15.8 and later:
- On the top bar, select Main menu > Admin.
- On the left sidebar, select Settings > General (
/admin/application_settings/general). - Expand the GitLab for Jira App section.
- Clear the Jira Connect Proxy URL text box.
- Select Save changes.